For this post I’ll be using Cubase Artist 11. Inspiration for this post came from the YouTube video by Chris Selim.
I’ve been using the Andrew Sheps “rear bus” technique for a while but have been using a single stereo channel with a stereo compressor as the rear bus. The real rear bus technique should use a dual mono setup, not stereo. I don’t have any compressors that allow me to unlink the stereo signal path into dual mono so I needed to find a workable way of making a dual mono setup in Cubase which, as Chris Selim points out, doesn’t support dual mono channels.
Here is my process. It works for me.
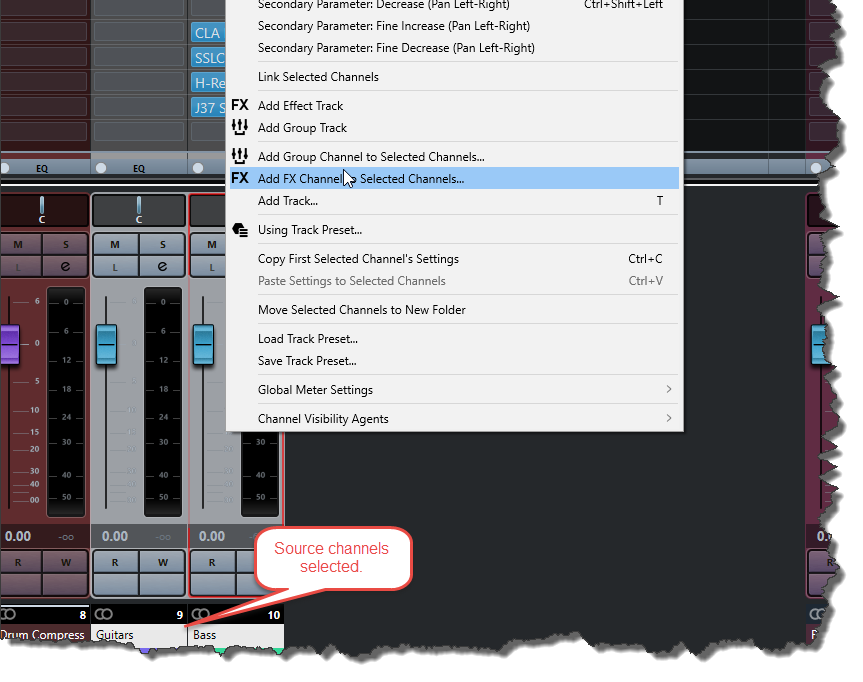
Step 1 – Select the channels you want to send to the rear bus.
Step 2 – Right-click and choose “Add FX Channel to Selected Channels”.
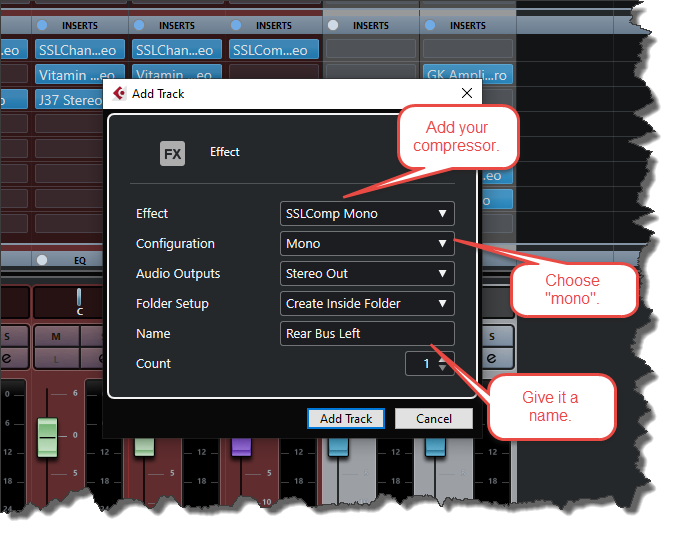
Step 3 – In the resulting popup choose your compressor of choice, set the channel to be mono and give it a name for the left rear bus channel (e.g. “Rear Bus Left”). Don’t worry about compressor settings, we’ll do that later.
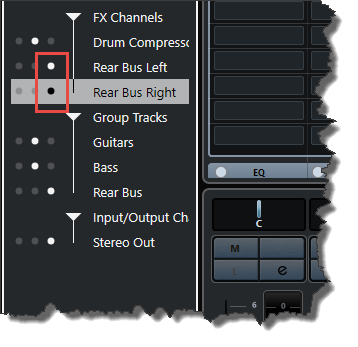
Step 4 – Repeat steps 1 to 3 but create a mono channel for the right rear bus and name it accordingly (e.g. “Rear Bus Right”).
Step 5 – Move the new FX channels to the right side of the mixer window to keep things tidy.
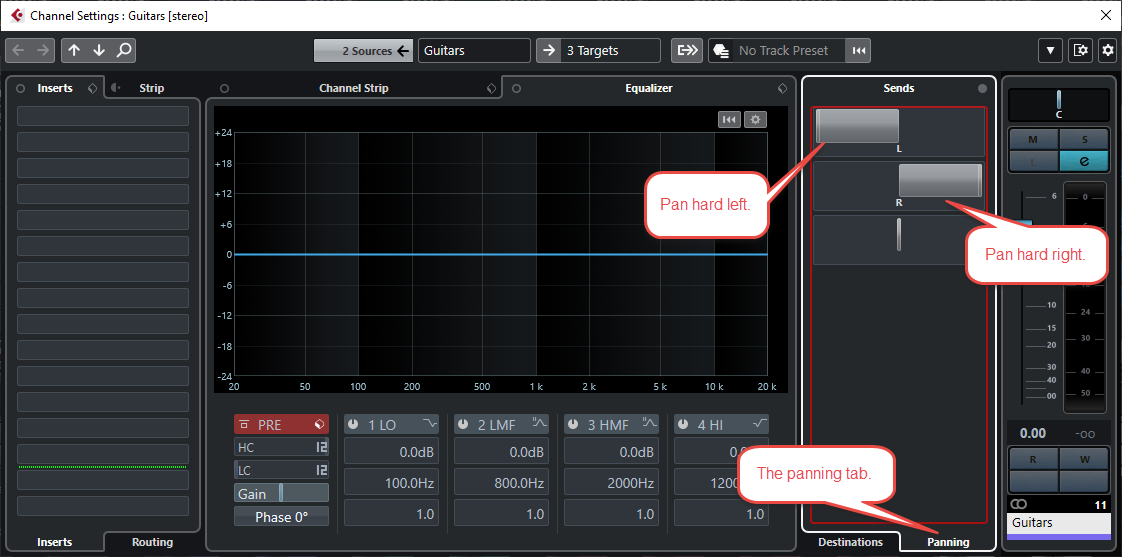
If you look at the channel settings for the channels you added the mono rear bus channels to you’ll see that they now have 2 new sends, one for each side of the rear bus.
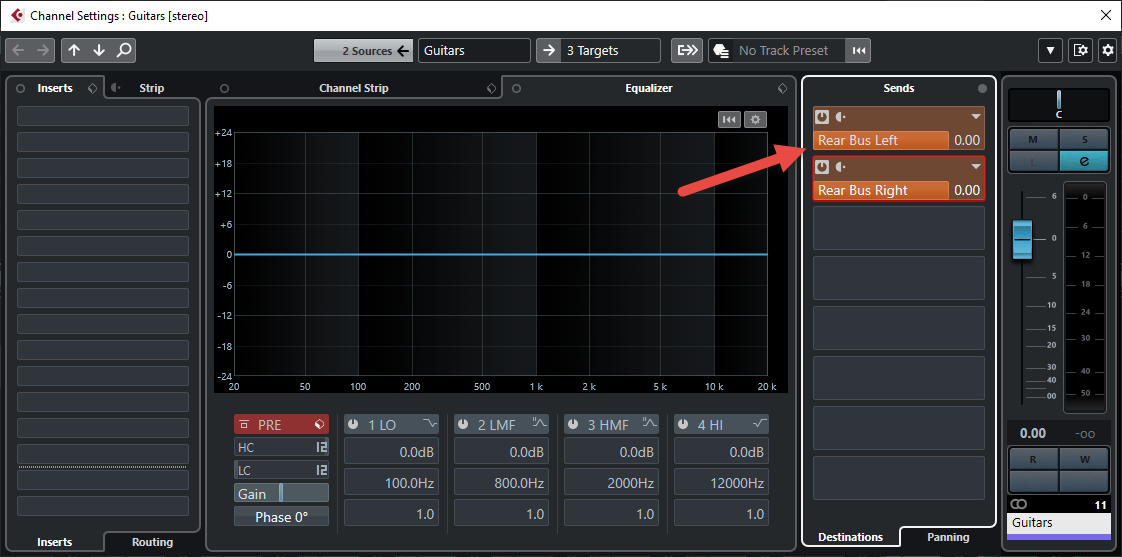
Step 6 – For each channel you want to add to the rear bus, open the channel properties and select the “Panning” tab for the sends. Pan the send to the “Rear Bus Left” hard left, and the “Rear Bus Right” hard right. You can use Q-Link here to speed things up. This ensures that only the left side of the signal gets sent to the Rear Bus Left, and the right side of the signal to Rear Bus Right.
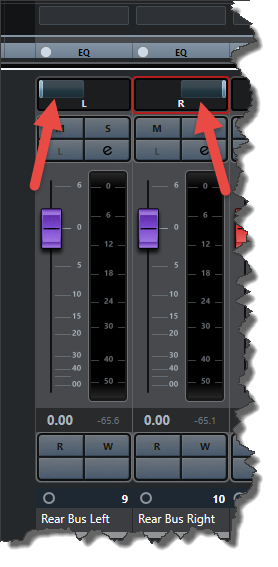
Step 7 – Back in the mixer, pan the “Rear Bus Left” hard left, and “Rear Bus Right” hard right.
Step 8 – Select the “Rear Bus Left” and “Rear Bus Right” channels. Right-click and select “Link selected channels” (note this deviates from Chris Selim’s video). Now, if you move one of the faders the other will move too. This is how we will control the amount of the rear bus signal to be added to the mix.
Step 9 – Setup your compressor to desired settings. Note that in Cubase Artist you are limited in how much the channels and their inserts can be linked. So you don’t have to make changes to each compressor individually select both channels and activate Q-Link. Changes to the compressor on one channel will now be matched by the other.
It did occur to me that you could simply route the two rear bus channels to a single group channel if you just want a single fader to control the rear bus level.